Home › Forums › Let’s Talk Photography › On-Camera Flash
- This topic has 7 replies, 4 voices, and was last updated 9 years, 10 months ago by
cameraclicker.
-
AuthorPosts
-
June 4, 2014 at 8:18 pm #19006
Trainwreck
ParticipantSo I was hanging out swilling my AM cuppa one day a little over a year ago and decided to set up this little deal. This is the original (or close to) write-up I did at the time. I’m not used to the interface on this site and there seems to be no way to preview a post so I’ll just jump right into the Big Middle, pull the trigger, and hope for the best!
If I had to (or could) remember, I have probably seen something like this on the web somewhere, but I just wanted to do it myself, see what I came up with, make some observations, and go from there.
The first thing that is typically mentioned about on-camera flash is not to use it. I would say that myself. But let’s face it, in the “real world” you can’t always shoot under ideal or controlled conditions. Bad/mixed/harsh lighting, bad backgrounds, the whole ball of wax!
I see photography as, at its base, a “puzzle”. As photographers I believe it is up to us to “solve” the “puzzle”! The more we shoot, the more we understand the nature of the “puzzle” and can use better “solutions” to solve it. On-site, in-camera and in post are all possible places we can solve the basic “puzzle”. This is what we hope will separate what we do from Uncle Bob firing the same shot with his pocket popper set on “Auto”!
If I want/need to use a flash, I can’t always put it on a stand, stuff it in a modifier, and get it off-camera! I don’t really even like to hand hold a flash because the lens/body I am using is oft-times too heavy to hold easily with one hand. And if you are shooting “run and gun”, then forget off-camera. On-camera flash is one alternative and under the right conditions I believe it’s not the Evil Light everyone claims.
So I just mostly wanted to yutz around a little with bounced on camera flash to get some directional on-camera light going on.
I wanted to use a real model. I couldn’t find one and this is the only one I could afford to hire! Please meet Miss Wanda Wigstan!
I got different WB’s because I picked up some of the color from the bounce surfaces. I was mostly interested in the direction of the light rather than worrying about color balance. I probably should have used a ¼ or ½ CTO on the flash but was too lazy. I bounced off the walls, a large white foam board (to simulate a wall, I had an open walkway where I wanted to bounce on one side), and the ceiling.
All shot with ETTL @ f/2.8, 1/125, 200mm, ISO200, and a FEC of +1-2/3 with the exception of the flash gun shot. The flash was zoomed all the way down to 105mm. This was for maximum efficiency. Shot from approx. 10 ft. away on a tripod with the background approx. 15 ft behind Miss Wanda. All processed with only some capture & output sharpening, a gentle S-Curve. Some exposure/highlight adjustment when needed. I cropped them as close to the same as I could for comparison.
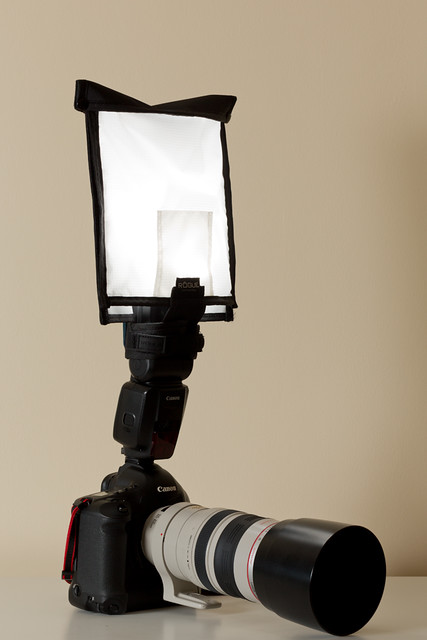
I flagged my hot shoe flash with a piece of square foam sheet wrapped around three sides of the flash and held in place with a rubber band. This was to keep any direct light from hitting Miss Wanda. If she could see my flash tube, then she would be receiving direct light. Being the quiet type, she wouldn’t say whether she saw it or not!
https://www.flickr.com/photos/125044926@N07/14158545830/
A couple of problems with Miss Wanda- She has catch lights painted in her eyes so I couldn’t gauge the catch lights. This is a biggie for me so I’ll probably repeat the exercise with a real subject. A lack of hair, not really much for eye sockets. But, she helped me see what I was looking for, which was where the shadows fell and how harsh they would be. At least she doesn’t whine much!
Short Side Lighting-
The side of the face away from the camera is lit. Bounced off of the wall camera right. I tried to get the bounce point slightly behind Miss Wanda.https://www.flickr.com/photos/125044926@N07/14343531192/in/photostream/
Broad Side-
The side of the face nearest the camera is lit. Bounced off a wall camera left.https://www.flickr.com/photos/125044926@N07/14158545340/in/photostream/
Top@ 45*-
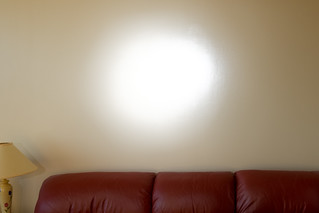
45* toward Miss Wanda bounced off the ceiling. Theoretically there should be shadows in the eye sockets (if she had any) but there is a pretty harsh shadow under the neck.https://www.flickr.com/photos/125044926@N07/14158482778/in/photostream/
Top Straight Up-
The shadow under the neck is getting softer. Bounced off the ceiling with the flash straight up.https://www.flickr.com/photos/125044926@N07/14158483248/in/photostream/
Top Angled behind @ 45*-
Nicer than full on, but starting to look a little flat to me. Bounced off the ceiling with the flash pointing 45* behind me.https://www.flickr.com/photos/125044926@N07/14158483248/in/photostream/
Behind @ Level-
Still nice but a little flat. I’m surprised she didn’t pick up my shadow.https://www.flickr.com/photos/125044926@N07/14158484919/in/photostream/
Full Straight On-
I just nuked Miss Wanda. No bounce. Hard shadow on the BG (15’ away) among other things. Very unflattering all around. Real skin would have shown hot spots and she is totally washed out.https://www.flickr.com/photos/125044926@N07/14345140975/in/photostream/
Theoretically, once a bounced flash hits the bounce surface, the bounced light becomes a large light source. Therefore a softer light source.
I would be a fan of Short side lighting! Slimming and complementary, especially for women. Simply bounce the light toward the direction the subject is turned.
Broad side maybe useful for males.
Top (angled back/behind would be good for older subjects maybe helping to mitigate some wrinkles, etc. Maybe as a “glamour” type of lighting, and for small groups (2-3).
Just a couple of comments from my end. I have more but I’ll just let anyone draw their own conclusions or make their own comments if they so desire.
I apologize for the “plastic” look with Wanda’s skin texture! I’ll try to get that more realistic next time! I must have “over-processed”!
Mostly, this was just fun exercise when I had nothing better to do!
Obviously there is some color balance problems. As previously mentioned I picked up some color from my bounce surfaces. This is something that definitely needs attention when shooting. An assistant can easily wield a white reflector in a perfect position for a bounce and would be a great way to go.
Here is a color corrected version of Miss Wanda demonstrating short side lighting.
https://www.flickr.com/photos/125044926@N07/14347654934/in/photostream/
Please feel free to comment if the urge strikes!
June 5, 2014 at 6:07 am #19008nesgran
ParticipantI will generally go for top 45 degree with a bounce card on the flash or a stofen (bounce card in large room, stofen in small). This seems to be the most fool proof way, especially when there’s more than one person in the group. It also requires less flash power than blasting backwards. Shooting outdoors a bounce card can be really useful to give just a touch of light to the subjects and it gives a catch light albeit not a great one.
I just find the times I’m using on camera flash most of my photos will have more than one person in it. I’m not sure about having an assistant with a reflector either as it would just be easier having him or her carry a speed light in an umbrella or light softbox like a gami light.
Direct flash has its advantages, my old canon does 1/400 flash sync speed with a manual flash and combine that with 10 fps you get a touch of strobe light to your subjects if shooting sports for example. Just don’t piss them off too much or cause epileptic fits 🙂
June 5, 2014 at 7:06 am #19009ParticipantHi nesgran,
I also know some folks who swear by assorted “gizmos”. The Joe Demb diffusion system for one. They get some very nice results too. It is really an on-flash bounce system. Fong-O-Spheres are another example. Some love them, some hate them, but I’ve seen good results from them.
Another thing I like, and I didn’t do it in this particular exercise, is using a flash bracket. Possibly in conjunction with an on-flash modifier. My main complaint about that its pretty unwieldy when you get that, a heavy camera body, and say, a heavy, fast zoom.
With this exercise the on-flash bounce card couldn’t be used because of the foam flag wrapped around the flash unit. But it’s a piece of cake to add a bit of catch in post. And in the event that there isn’t any catch light, I will most always add some. I consider that essential for most portrait angles.
I’d love to have 1/400 x-sync! As it stands I have to gang multiple speedlights and shoot high speed sync if I’m going to need that kind of capability.
And just to clarify for others who may read our comments nesgran, the flash needs to have full rotation and tilt capabilities for best all-around results.
June 5, 2014 at 9:08 am #19015Worst Case Scenario
ParticipantAnother great post there TRAINWRECK. I’m usually the one who touts the “less is more” approach. Your post shows why!
I shoot a lot of weddings and for 90% of the shots I use on camera flash. They may not be the best lit wedding pictures of all time. But I can reliably get good lighting EVERY time.
I don’t have a favoured set up, I find ceiling bounce looks great one week and looks awful the next. But as you’ve explained, there are several combinations to try and I always get one that works well.
Even direct flash works fine for fill flash, outdoors on a dull day.
Broad side and Short side, were taught to me as Fat and Thin. As fat people tend to look thinner when lit with Thin ( Short) lighting.
June 5, 2014 at 10:39 am #19022ParticipantThank you Worst Case.
Your post speaks of a seasoned vet and how one handles a typically fast-paced shoot on the fly. What you have described is what I believe the new shooters need to learn to get consistently great shots when they are under the gun.
Thank you for replying Worst Case.
As an aside? I had a great friend and mentor who, unfortunately, no longer with us.
She would explain to me how she would pose a bride using (her words not mine) fat bride/skinny bride! She would sashay over, turn 45* degrees to one side, put her hands on her hips (because you always get the arms away from the side of the body), turn her head toward me, and throw her hips back while yelling: “Fat Bride”! Then the would toss her hips out toward the camera and yell: “Skinny Bride” and repeat the whole process until I picked myself up off the floor from laughing and pay attention to what she was really telling me!
June 5, 2014 at 11:03 am #19023cameraclicker
ParticipantBroad side and Short side, were taught to me as Fat and Thin. As fat people tend to look thinner when lit with Thin ( Short) lighting.
Lookout! The politically correct will be chasing you about fat and thin comments. Did you see how many people were bent out of shape the other day because some New York store had a mannequin with ribs showing? The store had to take it down and issue an apology!
What you are shooting, why you are shooting and where you are shooting, all have a bearing on how you light or don’t light.
Outdoors bounce can be a challenge, and if you are moving around a lot, light modifiers will need assistants to move and position them, as well as to keep track of gear. On camera flash may not look as good, but it is way more efficient when you are by yourself. Being a fan of toys, here are a few options.
Starting at the inexpensive end of the scale, a piece of paper and an elastic band from the produce isle of the grocery store. Wrap the paper around the side and rotate the flash. Works great, gives good catch lights, needs a ceiling, preferably a white one.
If you get the Canon 600 EX RT flash, it comes with a little plastic holder and a couple of CTO gels in a case. You get full and half CTO. It may be possible to get others. If you use these gels, the camera can figure out a gel is in place and it sets the white balance accordingly.
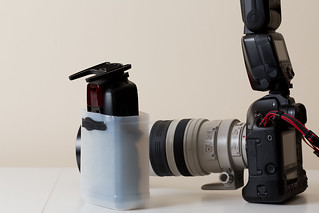
Moving to a slightly more expensive option, this is most of a vinegar jug with the label removed. It is held in place by a Velcro cable tie, available in rolls of 50 from Home Depot, they probably run around $0.08 per tie. The jug is free if you use as much vinegar as we do. This still works great with a white ceiling but will work without one. Efficiency can be improved by gluing some tin foil to top, sides, and back, that’s the extra cost option.
I like the vinegar jug option because it is easy to carry, the flash fits inside, even in the Canon case, though it is shown here without the case. It takes no extra space in the camera bag.
You can use the real Gary Fong Light Sphere, but I find it difficult to fit in my bag, so it lives in a drawer until I want to show it off like this. I think it was a total waste of $80.
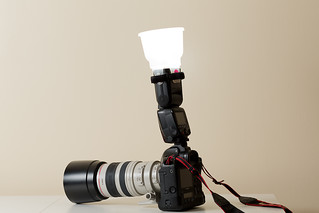
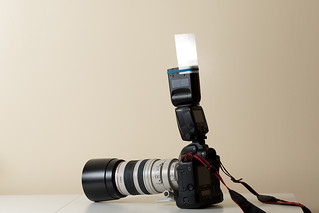
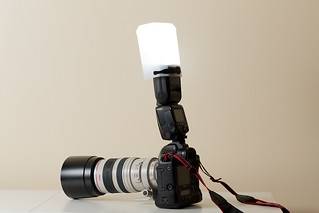
Rogue make some items that seem more useful, or at least that are easier to carry. This is a small bounce card, it has an extra piece that can turn it into a snout, or that can cover the white part. It is held together with Velcro.
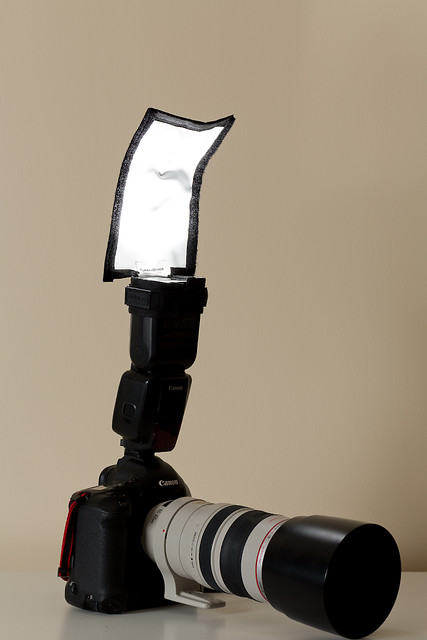
Rogue makes several sizes of their bounce card, they call this the Large size
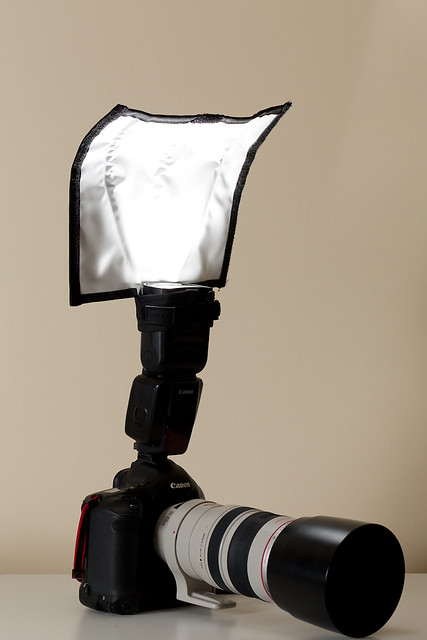
The blue pieces up the back are stiffeners. The large one is big enough to be rolled either white or black side in, to make a snoot
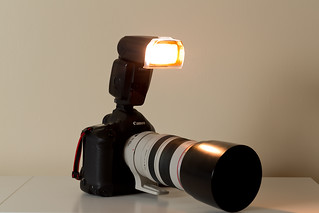
For a slightly softer look, they make a cover for the bounce card
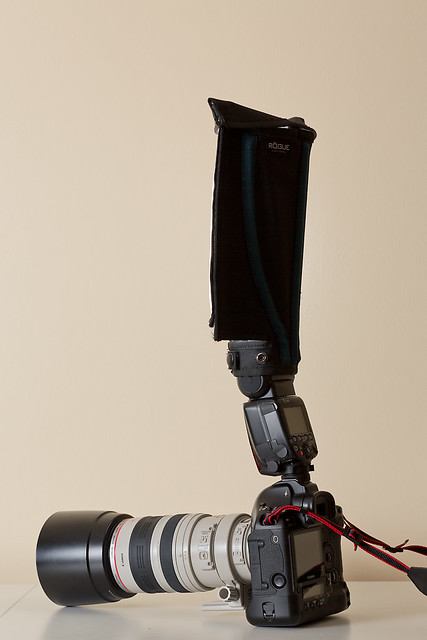
For more specialized effects, they also make a grid that has adjustable spread and does not take much space in a bag. The pieces can be combined to give 3 different spreads.
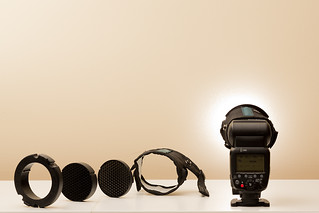
I like their grid because the light is pretty round
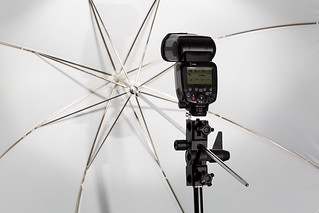
And, that’s the end of my little show, so I will finish with a shot showing what was lighting most of these shots
 June 5, 2014 at 11:14 am #19024Participant
Excellent addition cameraclicker.
B&H has nothing on c&c!
Truth be told your lighting post was what inspired me to put this up.
Thank you for that. I really enjoyed that post. Not to mention you are quite the swashbuckling, devil-may-care, derring-do looking type! Much better looking than that coffee can fellow you hang out with!
June 5, 2014 at 9:19 pm #19041ParticipantLOL! Thanks! There is a place downtown that sells used mannequins. When I get some time, I might see if I can get a couple of reasonably priced heads. I like the one you have. It looks better than my coffee cans, too.
-
AuthorPosts
- You must be logged in to reply to this topic.