Home › Forums › Main YANAP Discussion Forum › This, that, and automatic modes
- This topic has 67 replies, 13 voices, and was last updated 11 years, 1 month ago by
Drew.
-
AuthorPosts
-
February 18, 2013 at 5:32 pm #6773
jim-e
ParticipantOn that picture (which is beautiful BTW), did you obtain the desired exposure by looking at the LCD, or purely by metering?
February 18, 2013 at 6:18 pm #6775stef
ParticipantAjay (or now dont.care or whatever you plan on being tomorrow), you claimed that anyone using the camera’s automatic modes who thinks it’s right can look at the histogram and see how wrong it is. But you edited what you said, materially changed your references from “proper exposure” to “balanced exposure”, and, removed some of your snotty comments like “Gee do you teach lessons?”.
You’re right, histograms are ‘relative’ to pixels, from 0 – 255 in luminance value.. and luminance is how black or white a pixel is.. Tell me again how this isn’t relative to determining a balanced/properly exposed image?
The luminance of a pixel in reference to proper exposure only makes sense when you know what the luminance SHOULD BE. Knowing the relative values means nothing without a reference point. This is usually a gray card, or a gray/white/black card, or a color palette card. That is a fundamental concept you’re missing.
So, since you’re retroactively editing things, I’m going to assume you’re retracting your stance that histogram shows proper exposure and reveals poor camera auto modes. Because, if you believed that, you’d be pretty ignorant on what the histogram does.
BTW, excellent use of editing skills. Going back and materially changing your statement when called out after acting like a jerk? And then changing your name on the forums when called out by name? Pure Awesomeness. Perhaps you should go add in use of a reference luminance or gray card on your first post. That’d be Double Super Awesomeness and nobody would know!
February 18, 2013 at 6:27 pm #6776fstopper89
ParticipantI rarely use the LCD (except to review the photos) and don’t normally look at the histogram. I will have to try using the histograms a little more to experiment with what I prefer, I was taught to expose with metering so that’s how I’ve always done it. I checked the exif data and looks like I used partial/spot metering, so it was reading exposure info from the center of the image. I don’t like evaluative metering as often because sometimes it accounts for flat contrast.
February 18, 2013 at 7:15 pm #6777Participant@browneyedgirl89. I’m not sure what you mean by being taught to expose with metering, but my point was whether you review the photo, then adjust exposure to taste – or do you just use the built in meter, adjust, then shoot. Say you didn’t have an LCD to review the shot/histogram – would you be able to get close to the same picture using the built in meter alone?
I know this sounds a bit pedantic (it probably is), but in reality the LCD can fool you, especially in bright light. And histograms are only IMHO useful in “double checking” your particular subject that you’ve metered, and only if that subject completely dominates the frame eg. zooming in on grass (“0” ev), or a white dress (+1.7 ev) or a grey card(generally “0”). Check the spike in the histogram, if it correlates to your metered value, then you should be good to go.
Don’t get me wrong, I use the LCD all the time, especially for the “creative” exposures – but it is good to fully understand what the meter is telling you. I know if I was a working pro, especially with heavy flash use, I would have an indecent meter for sure. No guessing, and very consistent. The expo disc is supposed to be very good as well, but of course is no good for flash exposures.
February 18, 2013 at 7:45 pm #6779ParticipantI think I misunderstood your question a little. I use the built-in light meter to help judge where the exposure lies and then while I’m changing settings such as shutter speed or ISO, I can watch the arrow move along the number line which further helps me judge. Then, you’re correct, I do review it on the LCD (I was thinking you meant shooting in Live view mode, dumb assumption on my part!) and if it doesn’t look quite right I take another shot and adjust accordingly. However I think in a lot of situations I would benefit from looking at the histogram after the first shot, then I’d get it right on the second if the first wasn’t exposed quite as I wanted it. Sometimes using the light meter alone I end up with a handful of shots of the same scene. Granted, it is easier with portraits, as the main goal is to make sure the face is exposed properly. For shots like my sunset, there’s a range of “good” exposures and it kind of depends on the photographer’s personal opinion. After reading all the posts in this thread, I think the best thing for any of us to do is to use both or all methods available for exposing. I will for sure be checking my histograms from now on. Less trial-and-error that way I think.
Speaking on viewing the LCD in bright light, I usually walk into shade or cup my hand around the edges to get the most accurate view of it. I’ve set my cameras’ LCD screens to most closely match the brightness of the finished prints and my computer monitor. By default, LCD screens are often way too bright, giving a false sense of bright exposure when in reality the prints turn out dull. I know this from experience from when I was just starting out.
February 18, 2013 at 7:56 pm #6780Participanthistograms are only IMHO useful in “double checking” your particular subject that you’ve metered, and only if that subject completely dominates the frame eg. zooming in on grass (“0″ ev), or a white dress (+1.7 ev) or a grey card(generally “0″). Check the spike in the histogram, if it correlates to your metered value, then you should be good to go.
Precisely.
I use histograms all the time to check for horribly wrong exposure. It’s like an engine dummy light… it doesn’t tell you if your car is running right, it just tells you if certain parts have gone horribly wrong. The histogram is especially useful when shooting portraits and your camera can split the channels, because you can easily be deceived by the LCD when you blow out only one channel.
When setting custom white balance and shooting a gray card, I can use my camera as an incident meter by making sure the spike is centered. If the light is consistent, you can simply adjust manually to the light so that the spike is in the center, and then you know you have “proper” exposure. Not balanced, not flat, not maximizing tonality, but actual proper exposure.
It’s also possible that you don’t want proper exposure, but instead want to maximize the information in an exposure. Someone (Eggington?) alluded to this earlier. The histogram is invaluable for this, and it’s far easier to simply overexpose until the highlights hit the right side of the histogram than to use a spotmeter on all the bright areas of a scene. Note that “Exposing to the Right” is not about getting proper exposure. It’s about getting the most information possible onto your digital sensor for the SOLE PURPOSE of minimizing noise in the darks or preserving detail in the lights. It’s just a modern adaptation of the Zone system where you would expose your negatives for the shadows. Of course, it generally results in poorly-exposed pictures which need to be adjusted back to the proper exposures, but they will have less noise and more detail if done properly.
edit – @browneyedgirl
After reading all the posts in this thread, I think the best thing for any of us to do is to use both or all methods available for exposing. I will for sure be checking my histograms from now on. Less trial-and-error that way I think.
Checking histograms (or the LCD) is trial and error 🙂
There’s technically only one proper exposure, and that’s easily determined with an incident light meter near the subject, or histogram on a gray card. (The histogram is only relevant to proper exposure if you have a reference, such as a gray card.) The histogram, however, can help you preserve detail, especially if you push the highlights to the right side. But remember that this is not necessarily “proper” exposure, and is best used when shooting in raw, and will almost always require subsequent editing. (JPGs will make other adjustments that can mess you up, primarily white balance, contrast, and sharpening.)
But yes, make use of all your tools to get that picture. Even if you have to set it in P mode and have a reason for it, go for it.
February 18, 2013 at 8:54 pm #6783ParticipantBut what part of the histogram would you be looking at that would tell you the correct exposure? I’ll give you and example. Same light, same spot, but with two different subjects. One subject has very pale skin wearing a white dress, I get the correct exposure using an incident meter and take the shot with her dominating the frame. I then shoot a dark skinned guy with a very dark suit and take the shot. I’ve already metered using the incident meter – remember the light hasn’t changed. If you looked at the histograms, they would be wildly different – the white dress would be pushing the right side of the histogram(overexposure according to the camera meter), the dark suit would be very close to the left side(underexposure according the camera meter) – completely different, yet they are both properly exposed. All the histogram has told you is the range of tones in the photo, not whether those particular tones are accurate. Again, think if you couldn’t check your LCD and all you had was the camera’s meter, how would you determine your exposures?
Again, I’m probably sounding like a jerk but the OP made a good point – all the modes can have their uses, and telling people to use nothing but manual mode can be a false sense of control. It’s just as easy to use EV comp as it is to flip to manual and under/over expose according to the meter. And you can also use AE_L to “lock” in the exposure in any of the more advanced auto modes (aperture, shutter, and program).
In the end, use whatever works – I’m no different in that I “chimp” exposures but that’s because I’ve been shooting for a while and have a pretty good feel. Exposure is also part of the creative process. But for a beginner I think it’s important for them to know why and when to use manual. And that begins by understanding why the meter reads a certain way, why it fails, predict when it will fail and be able to fix it.
Stepping down from soapbox…..
February 18, 2013 at 9:01 pm #6784Participant@stef – Yes the red channel is one that I watch closely when it comes to skin – if you blow it out the skin can look bad.
February 18, 2013 at 10:53 pm #6788IHF
ParticipantI just have to chime in to say how incredibly entertaining this thread has been, and how I am, for the first time very happy my eyes are screwed, and I am unable to preview anything while I’m shooting lmbo (other than checking color and comp, or maybe if the exposure is REALLY jacked), it’s just a blob of a blur. Eventually though I would like to tether up somehow so I can.
back to the original subject
I’ve never really messed with P too much. I thought P would be good for others to use when I wanted in the picture, but it always failed me. So now if I need a non tog to shoot, I slide it to AV and just adjust the aperture. I use AV quite a bit though for snaps. In fact all the time for quick snap shots. Shutter priority I have played with, but most times when I’m wanting to control shutter speed for creative purposes, I want to be in manual anyway.
the way I see it is, the final image is way more important than how you got it. If a tog can make me go WOW or gasp shooting on P, the images don’t lose any credibility. (But I have yet to have that happen)
February 19, 2013 at 11:14 am #6799KeyAndFill
ParticipantMy intentions were not to make people choose sides and draw lines (red rover, red rover). However, I do feel that this post was a success. I started the thread in hopes that people may realize that shooting on Manual isn’t the defining characteristic of a Pro. I think jim-e said that turning dials in manual mode to get the ev meter to read zero still makes us slave to the light meter, and that’s what we are supposed to be, slaves to the light. I’m afraid that people who are aspiring pro, or have recently went professional have it embedded in their brain that manual is the only thing a photographer should shoot in. Camera manufactures like Canon, Nikon, Olympus, and the rest put light meters in their high end DSLR not so that mom can run out and buy the weekly Best Buy special and open shop. They put it there as a tool we can use, and should use. Let’s back up to my original post. By putting the camera in P mode and pointing it at your subject you will get a reading from your built-in reflective light meter, f/16 at 1/250th. Now you have a jumping off point. Its up to you, as a smart, patient, well-informed photographer to interpret that information. You may want to over expose that scene a stop for whatever reason. Now you can switch to manual and dial in f/16 at 1/125 or f/11 at 1/250, that’ll depend on your focal length. Or I suppose some will just switch it to manual and keep turning dials until the arrow points to zero, shoot, and then decide to open up. Yes, we would both get the same exposure probably, I do it my way, you do it yours. The reason for the original post was the bashing of the automatic modes. Manual doesn’t make you a good photographer. Manual says you understand some terminology.
I’ve not heard it neigh for a while, this horse could be dead.
February 19, 2013 at 12:26 pm #6805cameraclicker
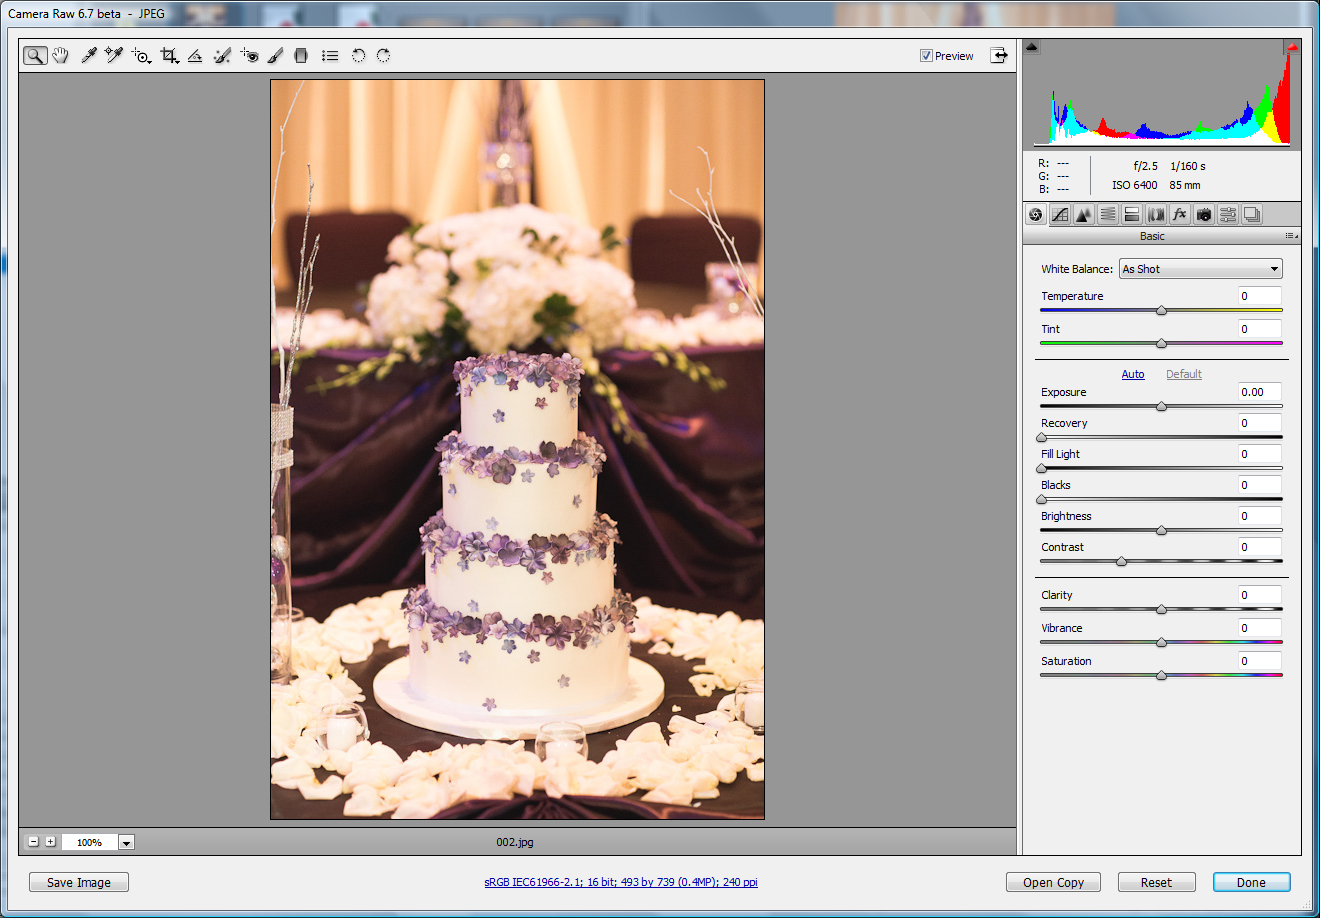
ParticipantAuto modes vs Manual mode and choices of metering modes are interesting discussions. I used to shoot slide film, digital has made life easier as you get instant feedback, be it the monitor or the histogram. Personally, I find the histogram more reliable than the monitor.
This set of photos is from a wedding last month. I don’t know if it will clarify anything or just muddy the discussion further, but here are four photos, three viewed in Camera Raw so you can see the histograms and the fourth is the one that was used on my web page.
The wedding was shot by a professional photographer, and this was taken from their web page: Manual mode, 1/160th, f/2.5, ISO 6400, Canon 85 mm f/1.2 L lens
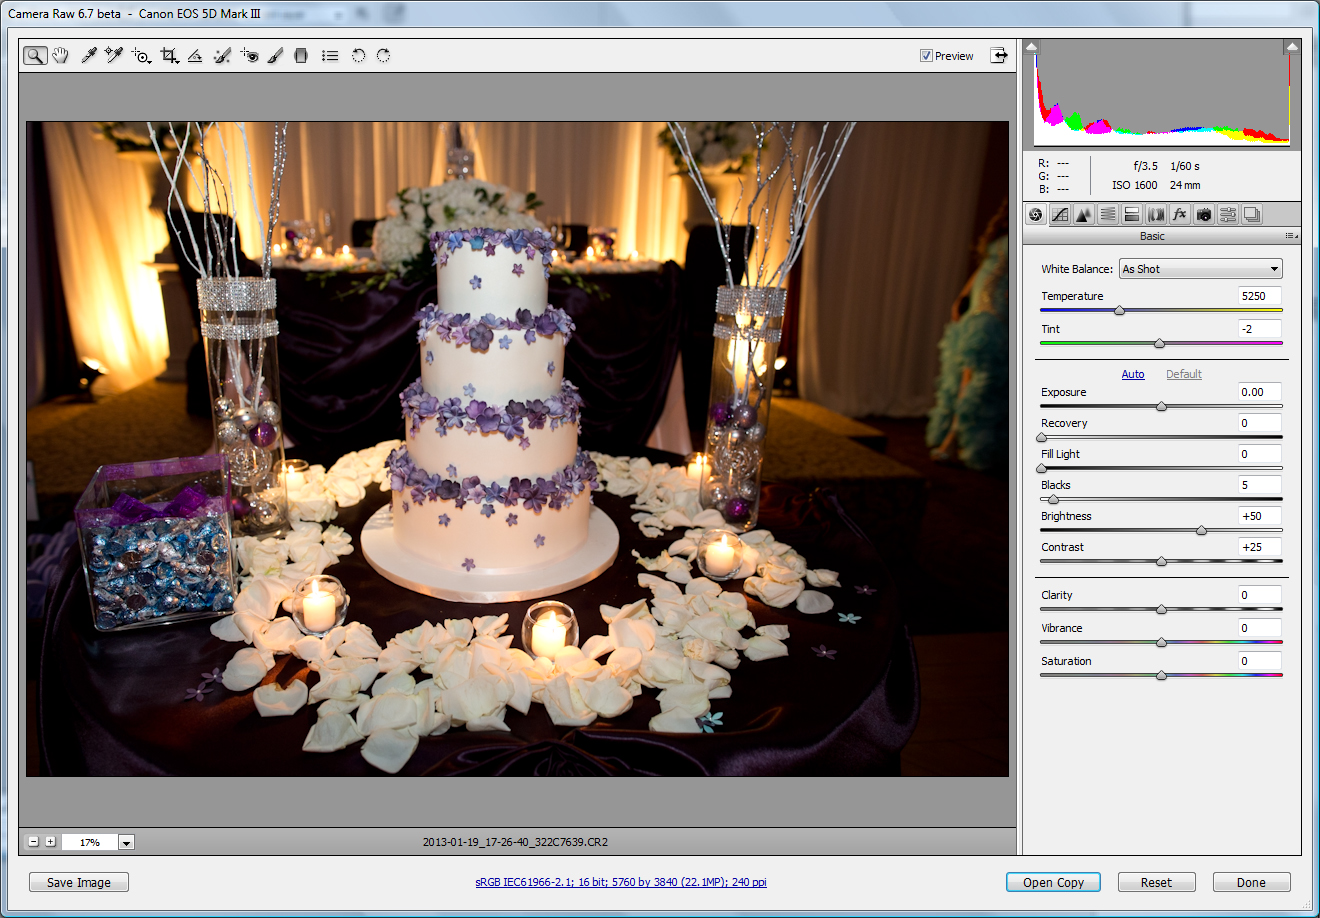
This is one of mine, opened in ACR, with defaults: Program Mode, 1/60th, f/3.5, Exp Comp +1/3, ISO 1600, flash comp 0, Canon 24 mm f/1.4 L lens
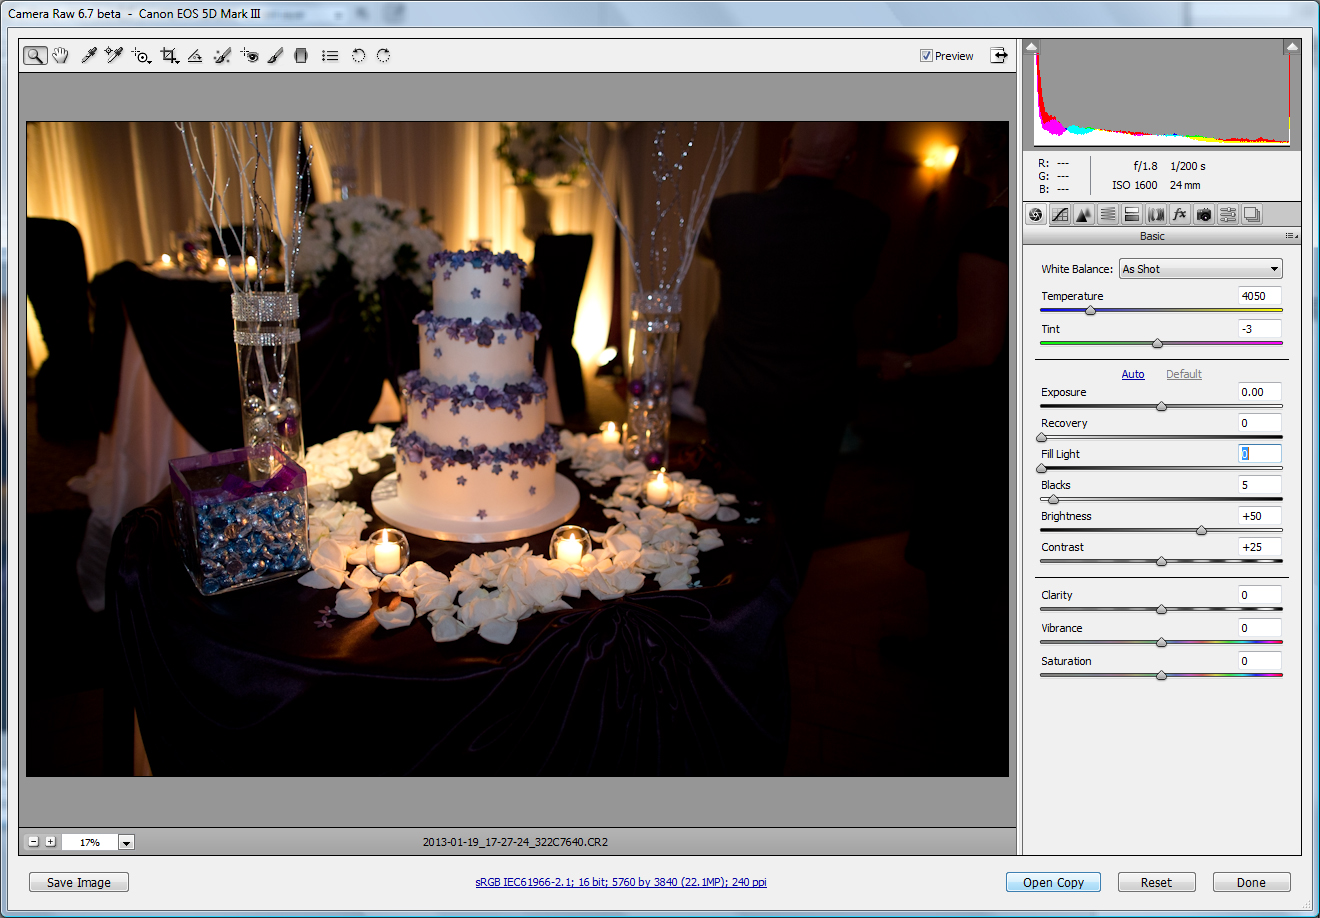
This is another of mine, opened in ACR, with defaults: Program Mode, 1/200th, f/1.8, Exp Comp +1/3, ISO 1600, flash comp -2, Canon 24 mm f/1.4 L lens
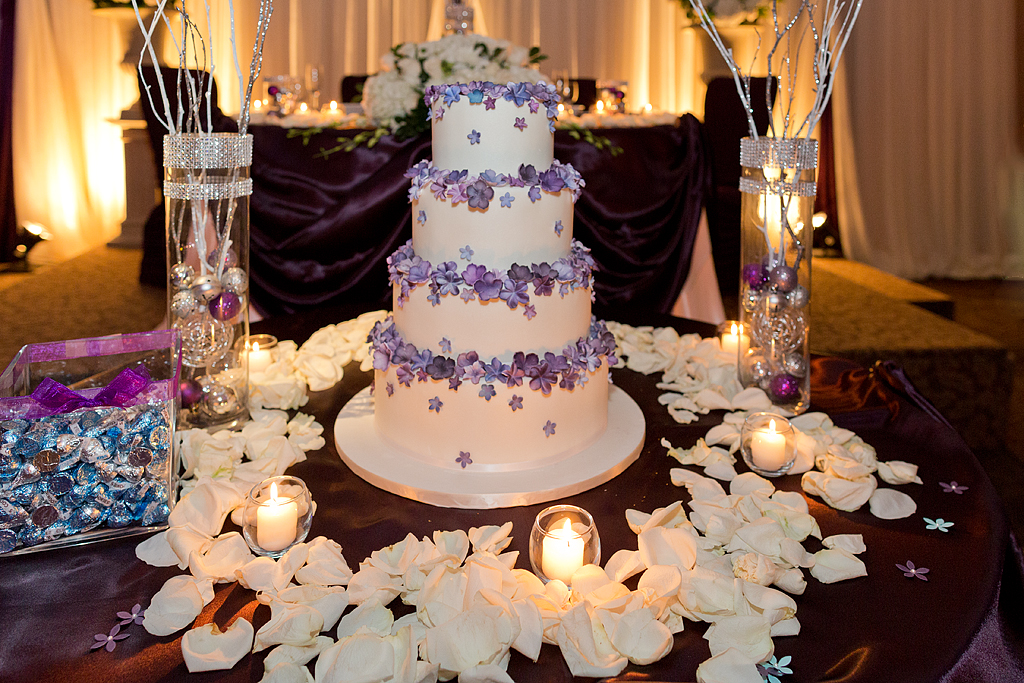
This is the photo that went on my page: Program Mode, processed in ACR, it was taken between the Program Mode and Aperture Priority photos shown above, with the same settings as the other Program Mode shot, then processed using both Fill and Recovery sliders as well as Lens Correction to remove keystoning.
A final thought for this post is that had I realized this discussion was coming, I would have taken a shot of the cake in manual mode as well, but I don’t bother with manual mode for shots that don’t benefit from using manual mode, so I borrowed someone else’s photo since the subject, time lighting and even camera bodies were similar, they chose a different lens but we both used Canon 5D Mk III bodies. The mode does not make a huge difference to the image unless you want to deviate from what program mode provides, mostly control of aperture to affect depth of field. As far as exposure, you can alter ISO, shutter and aperture; as long as you keep balance the exposure should be the same, and from the examples above we can see that manual mode is not a magic solution.
February 19, 2013 at 12:30 pm #6806dont.care
ParticipantStef, haha, I did remove some of my “snotty” remarks and added ‘balanced’ to some spots, you mad? As far as the discussion with the histogram goes, that ship has sailed for me. We’ve obviously got different methods to the madness.. I’m not going to argue about that with you. Whatever you do works for you, and the same with me. Like I said, different strokes for different folks..
p.s., if sometime later if I want to remove what I write, I’ll remove it.. don’t like it? .. don’t care. I don’t live in communist America yet!
February 19, 2013 at 2:06 pm #6808ParticipantJust wanted to add this. it was an interesting read.
http://thecandidframe.blogspot.com/2012/08/this-is-why-your-picture-suck.html
February 19, 2013 at 2:33 pm #6809Participantheh, i fall into #2, I bought a 24mm ts-e and haven’t used it yet.. looked at it, stuck it in my box and, there it sits.
February 19, 2013 at 3:31 pm #6816Participant@Cameraclicker, personally, I like the first image of the cake from the photographer hired for the wedding. The whites are a bit blown out, but other than that, The white balance seems more accurate and if they used a flash, it was less-intense than yours and created less shadowing on the objects behind. I also like the shallower depth of field since it isolates the cake. Is their composition perfect? Maybe not. I probably would have lowered myself a bit because the bouquet on the table in the background seems to be just barely sitting on the cake. But I prefer the vertical orientation since the stuff in the sides of your images is distracting.
-
AuthorPosts
- You must be logged in to reply to this topic.